If you use Excel Filters then you’ll love this time saving tip.
This tip was sent in by Mohammed Mustafa of Jeddah, Saudi Arabia.
Once you’ve set up your filters it requires at least a few clicks to apply them, but not anymore. With AutoFilter you can do it in two clicks!
Taking the example below we’ll do it the slow way and then the AutoFilter way:
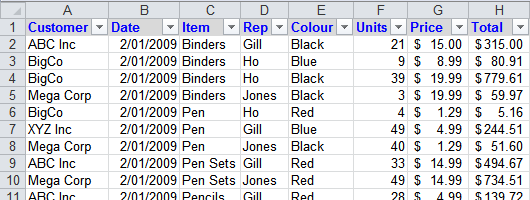
Let’s say we want to filter on the item Binders.
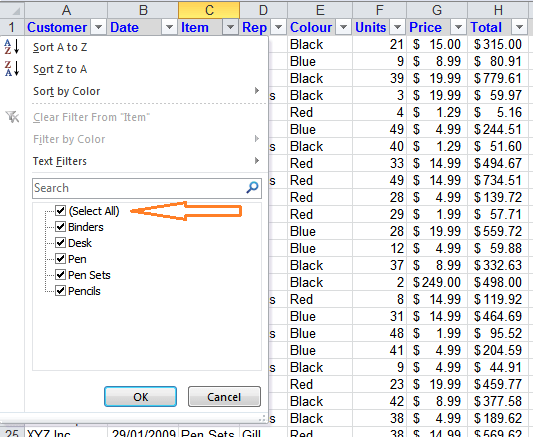
The Slow Way to Filter
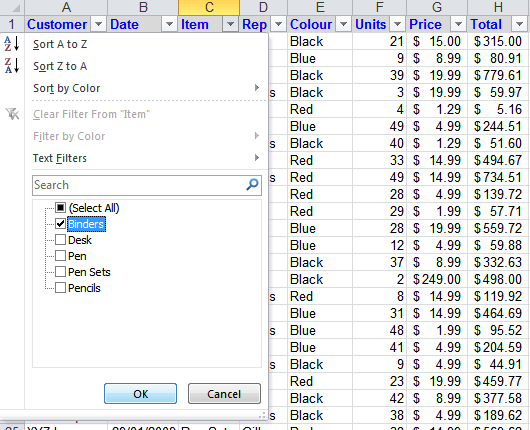
- Click on the down arrow in the Item header.
- Uncheck ‘(Select all)’.
- Check ‘Binders’ and click ok.
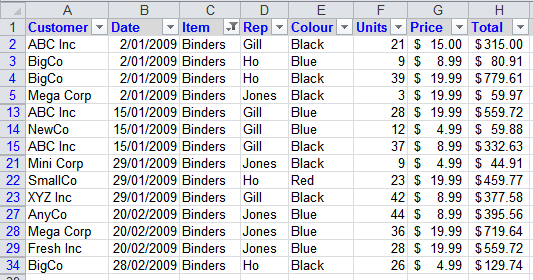
- Voila, 4 clicks later we’ve filtered our data and have this:
The Quick Way to Filter
The quick way requires you to first put the AutoFilter icon in your Quick Access Toolbar (QAT) or in a Custom Group in the Ribbon, but once that is done it’s there every time you open Excel, to use again and again.
Locating the AutoFilter Button
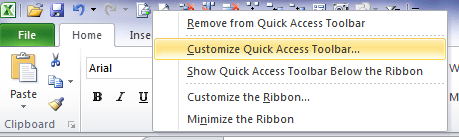
- Right-click on either the QAT or the Ribbon and select Customize Quick Access Toolbar, or Customize Ribbon, depending on where you want your icon. Personally I think it’s perfect for the QAT as it doesn’t require any navigating through the ribbon to locate it.
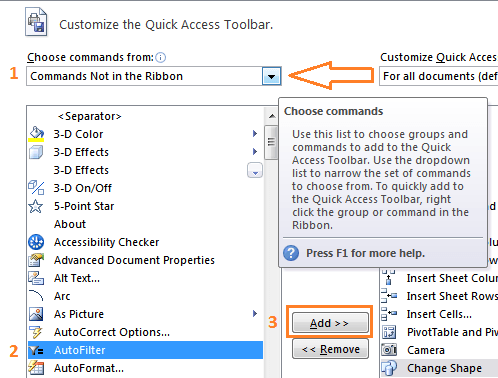
- Choose ‘Commands not in the Ribbon’ from the ‘Choose commands from:’ list.
- Locate AutoFilter and click the ‘Add >>’ button to add it to your QAT.
Ok, now you’re ready to use your icon in the QAT.

Using the AutoFilter Button
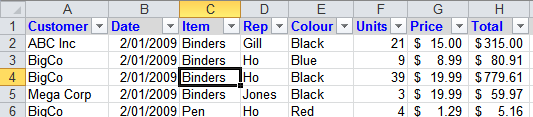
- Select a cell containing the criteria you want to filter on. I’ll select binders in cell C4:
- Click on the AutoFilter button in the QAT
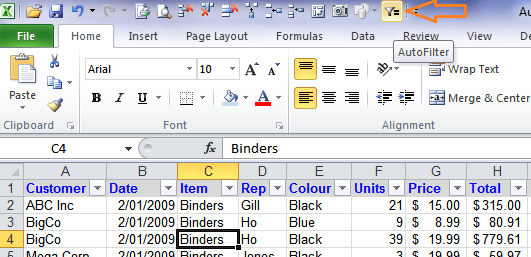
Voila, in a maximum of just two clicks you’ve filtered your data.
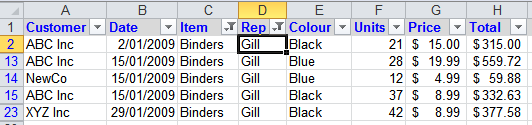
You can continue to apply additional filters in the same way. For example, if you wanted to then filter on the Rep, Gill you could click on any instances of ‘Gill’ and then click the AutoFilter button and your data will look like this.
Click here for more on Excel Filters
Thanks for your cool tip, Mustafa.
Mohammed Mustafa is from Jeddah, Saudi Arabia. He loves Excel and teaches it on a part-time basis.
Vote for Mustafa
If you’d like to vote for Mustafa’s tip (in X-factor voting style) use the buttons below to Like this on Facebook, Tweet about it on Twitter, +1 it on Google, Share it on LinkedIn, or leave a comment….or all of the above 🙂
Attaching the autofilter to the Quick Access Toolbar does not activate the filter for that cell but just turns on and off the auto filters… this feature is so useful, how do we get MS to correct this? Advice urgently requested.
Andy
Hi Andy,
Unfortunately if your data is formatted as an Excel Table pressing the Autofilter icon will only turn the filters on or off. If your data isn’t formatted as a table the tip works as described.
Kind regards,
Mynda.
I have the same problem as Norm Lacroix.
the button will have a strange ‘yellow’ background and it does not activate the filter for that cell but just turn on and off the auto filters…
Bugger!
Uhg, bugger alright! 🙁
This is awesome. I never tried this. Now on this is my favorite part of filters. 🙂
Cheers, Ganesh!
I use Excel 2010, I put the AutoFilter on my QAT, and when I tried to use it, all it did was turn the Filters ON & OFF it did not filter the sheet as demonstrated.
Hi Norm,
Are you sure you are using the AutoFilter button. The Filter button looks exactly the same as the AutoFilter button in the list of commands when customizing the QAT/Ribbon.
I suspect you’ve added the Filter button to your QAT/Ribbon not the AutoFilter.
HTH.
Mynda.
Hi Norm,
It seems that if your data is formatted as a Table pressing the AutoFilter icon simply turns the filters on and off. Perhaps this is your problem?
Kind regards,
Mynda.