If you've only ever used the user interface (Ribbon and menus) to create your transformations then you're missing out on some neat things you can do by using the Power Query Advanced Editor.
In this post I'd like to show you what's in the Advanced Editor, how you can write code in it and hopefully make you a bit more confident to use it when needed.
These tips are for Power Query in both Excel and Power BI , but I'll be using Excel to demonstrate.
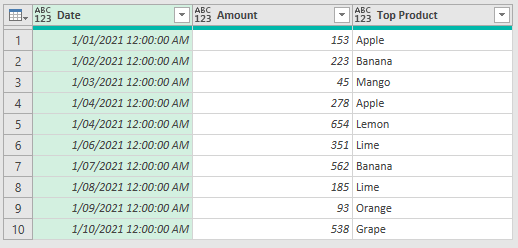
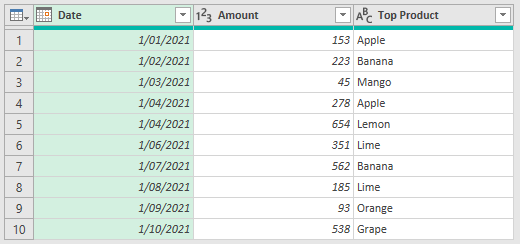
Here's my dummy data loaded into Power Query from a table in an Excel workbook.
When you add a step, typically you are working with columns and rows in a table.
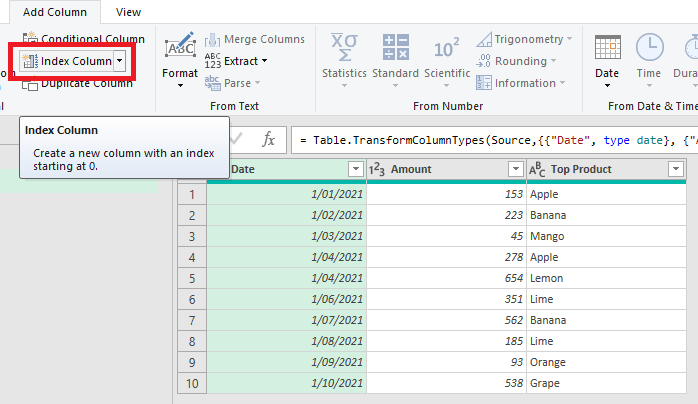
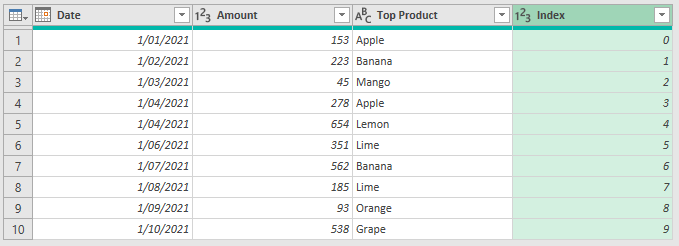
Like adding a column
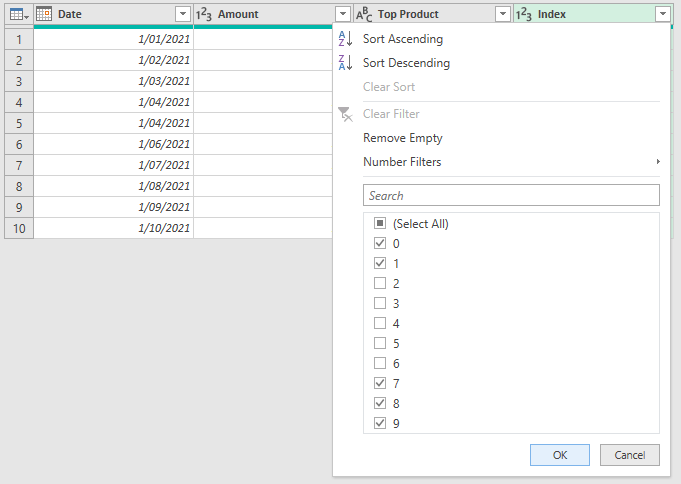
or filtering out rows.

The GUI (Graphical User Interface) takes care of the code underneath - it writes the M code to do what you want.

But you can use the Advanced Editor to modify the code the GUI creates, or write your own steps.
Code Structure in the Advanced Editor
The code for a typical query will look like this
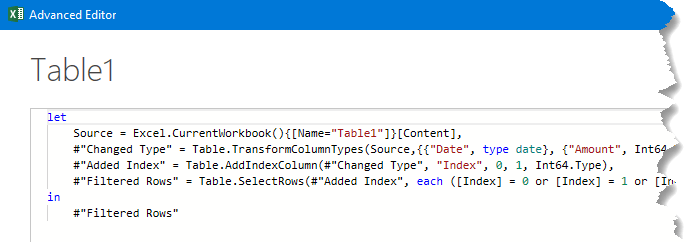
The code is separated into two sections, the code after the let keyword and the code after the in keyword.
The lines of code after let are your transformation steps. The line after in tells the query what to return as the result of the query.
Each step has its own line, and each step ends in a comma, except the step before the in keyword.
But, steps don't have to be on their own line. If I edit the code so that there are multiple steps on a single line, but each step is still separated by a comma

the query still works. Obviously though, having a single step on each line helps with readibility of the code.
Step Naming Conventions
Step names must be unique.
Steps created by the GUI typically have a name like #"Step Name". Although step names containing spaces must be enclosed in double quotes and preceded by a #, the auto-generated step names do not have to be like this.
If you want to change the step name, for example the #"Changed Type" step, it can be changed to Changed_Type and the step still works fine.
But if you reference that old step name anywhere (usually in the next step) you need to change that to the new name too.
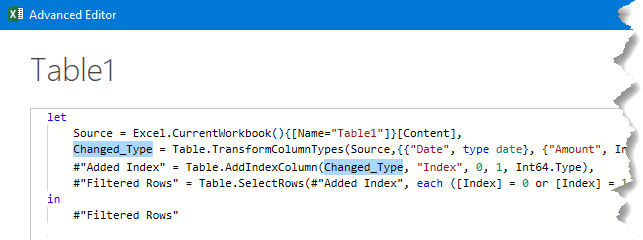
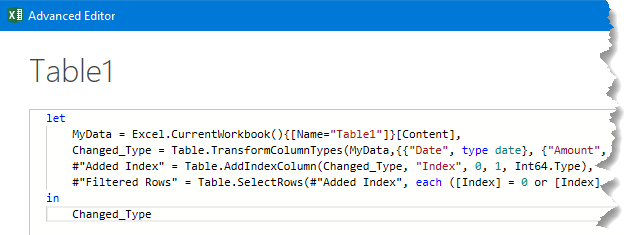
Source is typically the name of the first step, but you can rename it to something else, here I've renamed it to MyData.

The Query Result
The result of the query is specified by the in keyword. Whatever step is named here is what the query returns.
Changing the name of the step following the in keyword causes the query to return the result of that step.
Manually Writing Code
Typically each step results in a table but that's not always the case.
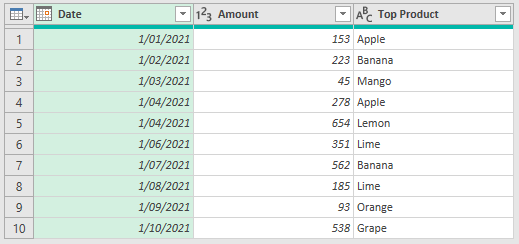
Let's say I want to work out the total of the values in the Amount column. First I'll delete the Filtered Rows and Added Index steps so I'm left with this table
I can select the Amount column and from the Transform tab, Statistics, click on Sum.
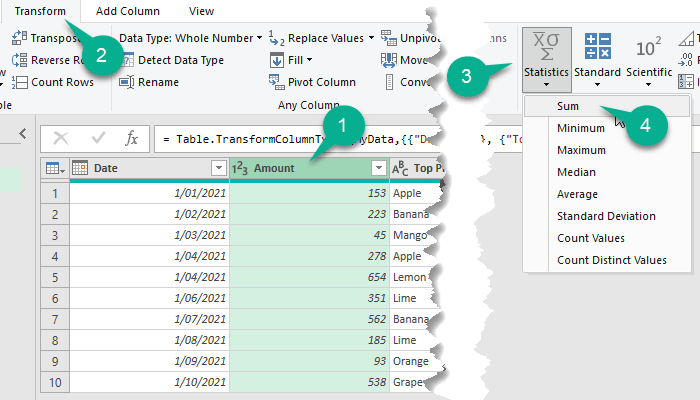
This gives me a single value, the total of the values in the Amount column, and this is now the result of the query.

This isn't actually what I want as the query result, but I do want the Amount total to use for later calculations.
If I go into the Advanced Editor, first I rename #"Calculated Sum" to Total. Then I move this step above the Changed_Type step, and change the step returned by the query to be Changed_Type

and the query now returns a table again, the result of the Changed_Type step.
But the Total step contains the total of the Amount column, and it gets these values from the step that comes after it. It might seem strange that these steps are 'out of order', but that's the way Power Query works.
I can add a Custom Column and use the value in Total to calculate the percentage each value in Amount contributes to the Total.
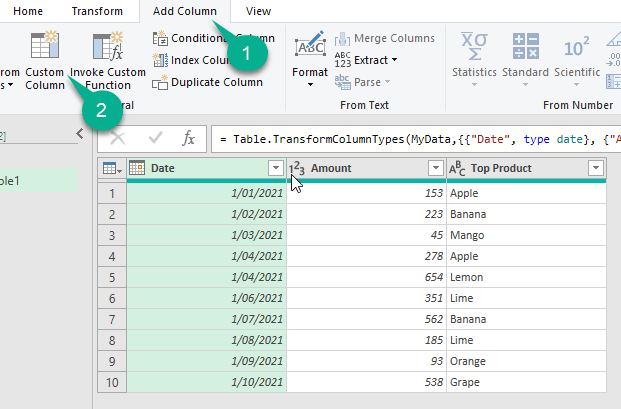
Using the GUI here the code looks like this
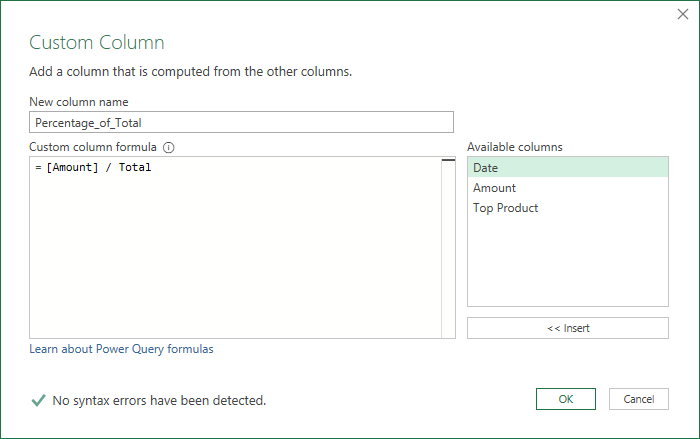
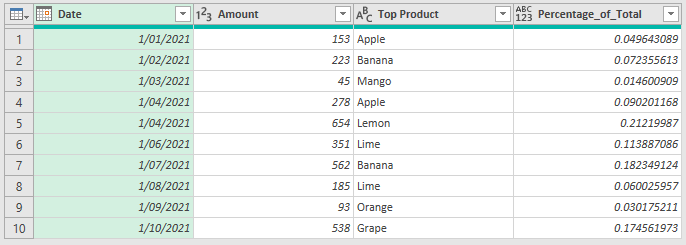
Giving me a new column showing the percentage (as a decimal here) that the Amount on that row contributes to the Total of the Amount column.
NOTE : I know I could also add a Custom Column and use List.Sum on the Amount column, but I'm just illustrating what can be done using the Advanced Editor.
Let's look at another example where I can use a step to store a value for later calculations.
Create a new step in the Advanced Editor called Target and set it equal to 500. I'll use this to create a new column that shows what Amounts are above this constant value.
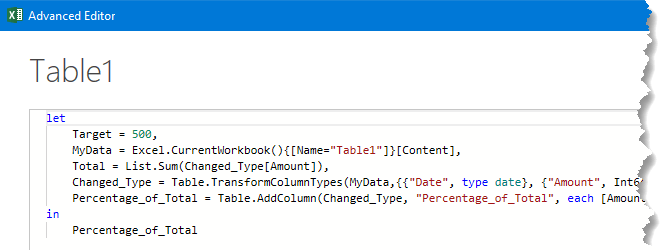
Close the Advanced Editor and then create a new Custom Column with this code
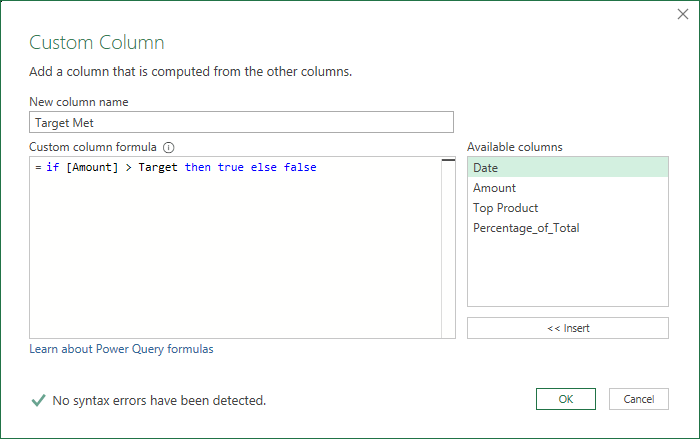
this shows that 3 rows exceeded the Target.
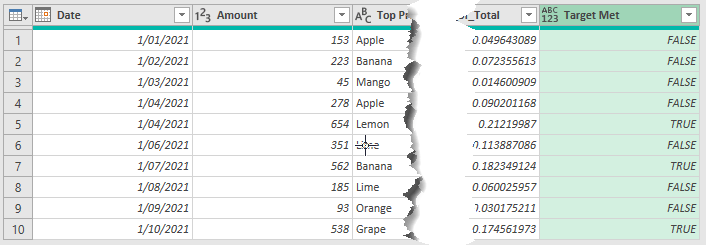
If I edit the Target value to be 600
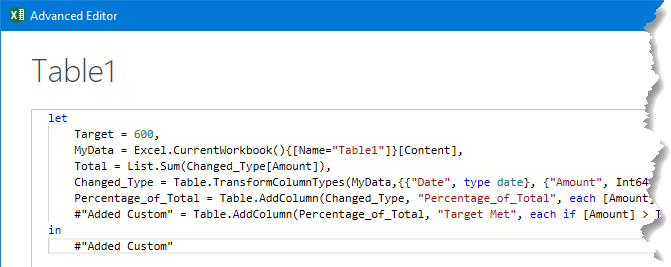
I don't need to change any other code but the query result changes to show that now only 1 row exceeds the Target.
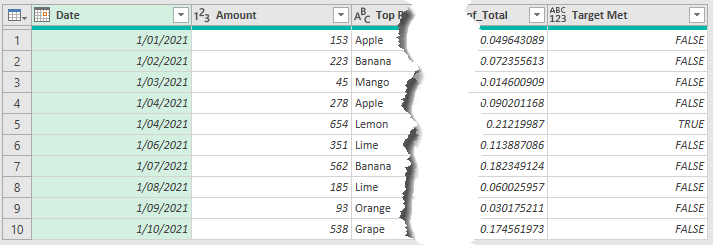
Note: You could also edit the Target value by selecting the Target step in the Applied Steps list and changing the value in the formula bar
As I've shown, steps can result in not just tables, but also values like numbers and text, and even lists and records.
I'll show one more example using a step to hold a list.
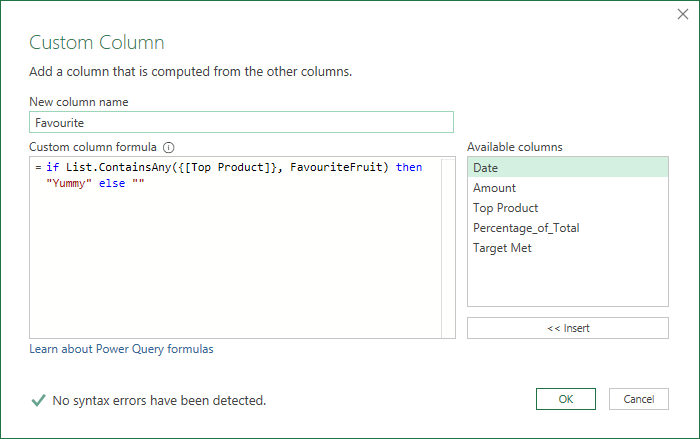
In the Advanced Editor create a new step called Favourite_Fruit and set this to equal a list consisting of Apple and Orange.

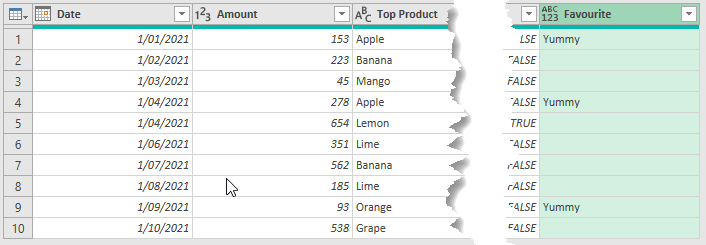
After closing the Advanced Editor create a new Custom Column and the code here uses the List.ContainsAny function. What it is doing is checking if the Top Product is in the list in FavouriteFruit, that is, is the Top Product either Apple or Orange.
Comments
Comments can be added via the Advanced Editor. You can have multi line comments or single line comments.
Multi line comments are surrounded by /* */ so if I wanted to add some comments to the top of the code I can do so like this
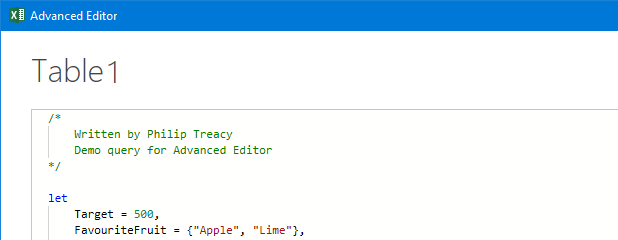
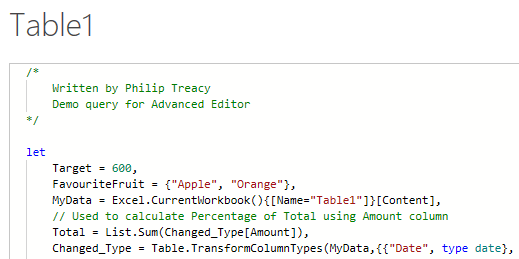
Single line comments start with // and can be used to not only add some useful information to the code as you are reading it, they become tool tips for the step that follows.
If I add a single line comment above the Total step, then close the Advanced Editor
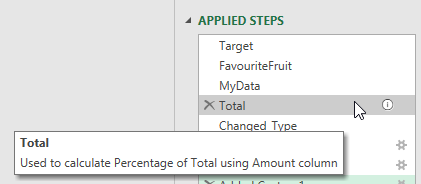
The Total step now has a small i (information) icon beside it. This indicates that there's a tool tip available for it, and by hovering the mouse pointer over it, it appears.
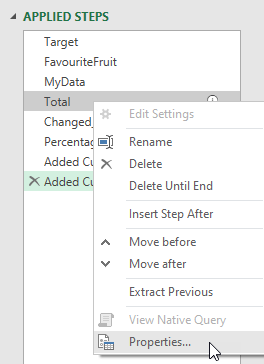
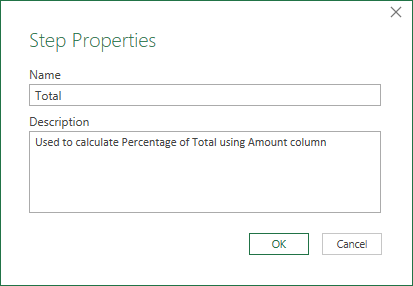
This single line comment also becomes the Description for the step properties
Functions
Lastly let's look at writing an 'in-line' function. It's described as 'in-line' because it's not a separate query, it's in line with the other lines of code of the main query.
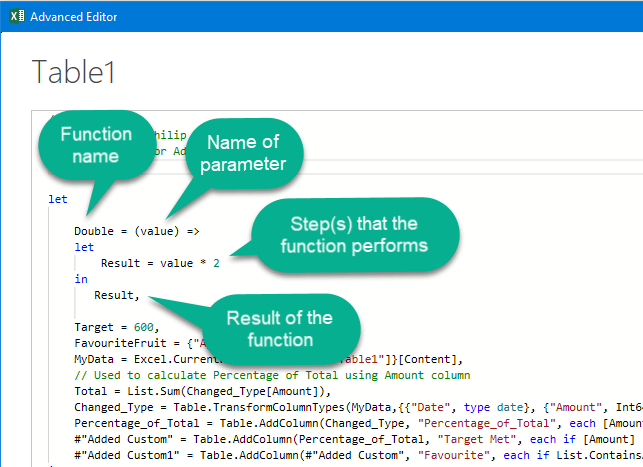
I'll write a simple function called Double that doubles any numeric value it receives.
Towards the top of the Advanced Editor window I enter the function code, here's an explanation of the function structure.
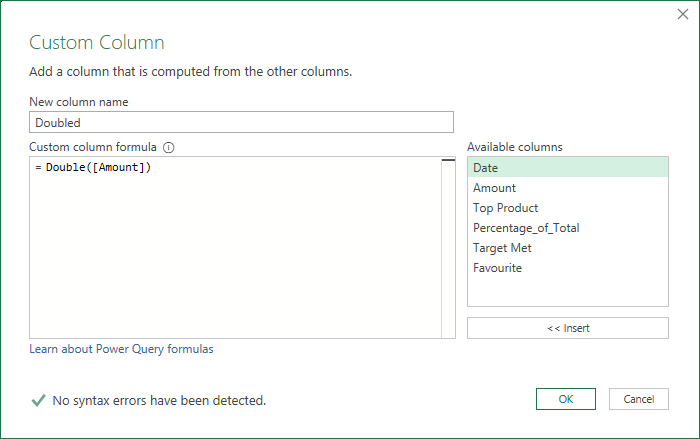
Closing the Advanced Editor just saves the function code into the query, in order to use the function I need to call it like any other function and I can do this in a new Custom Column.
By calling the function and passing in the value from the current row of the Amount column
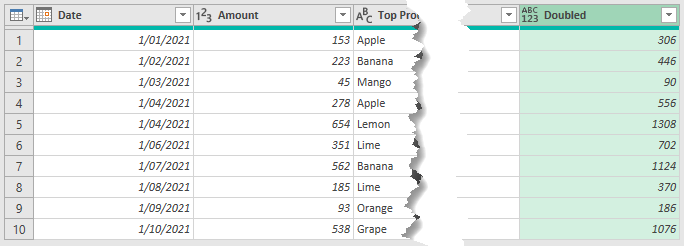
My table now has a new column containing the Amount values multiplied by 2.
Conclusion
Understanding what you see in the Advanced Editor and how to write and modify code in there allows you to do some things that you can't do using the GUI alone.
I hope this has helped you understand this and makes you more confident to use it to write M code.
